|
Nimbus Vertical September 2001 |
|
| Ok, here we go again. Another glider, another project. Renee says I can't own anything without taking it apart or polishing it or something. She's right. So, I made this great deal with Charles and Jo swapping 686 for this Nimbus and they told me it had some crazing in the gel-coat. Turns out it wasn't nearly as bad as I imagined and the wings are great. The tail had a repair done years ago when someone ran it sideways into something and smacked the tail. The tail was repaired nicely, but the old gel-coat was crazing pretty bad in places around the repair and after 20 years is discolored - so I figured I'd start here. | 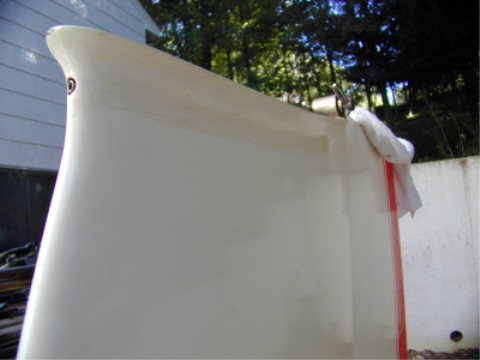 |
| After the 911 tragedy, I found myself with an entire non-flying weekend, so I started off Saturday by doing some sanding. The DeWalt random orbital beast took the gel-coat down nicely, but I stopped before getting too far and just enough to show fiberglass and carbon-fiber in the high spots. I found it important to remove all cracked gel-coat. | 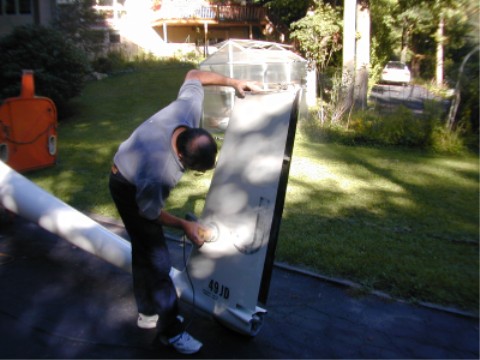 |
| Rudder came right off once I found my 14mm wrench. Remove the cotter key, spin off the nut, disconnect the antenna lead, lift the rudder up and off it comes. You can see the splices where they installed the new vertical stabilizer C-F panels when they repaired the fin. A little fairing with 220 and some hand-sanding to get it flat, mask it up and it's ready for gel-coat. I'm starting to like composite gliders - easier to refinish than that aluminum polishing stuff. | 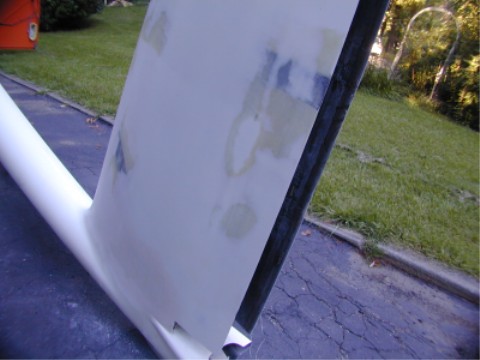 |
| I sprayed the Simtec 2481 with a small paint gun - I was surprised at how sputtery it was - a bit taken aback at first, but then I got used to it and just started layering it on. I sprayed three coats in quick succession to get it nice and thick. Some spots I really layered it on and let it run into some voids and low spots since I knew I'd have to sand it all down in the end anyhow. Better too much than not enough | 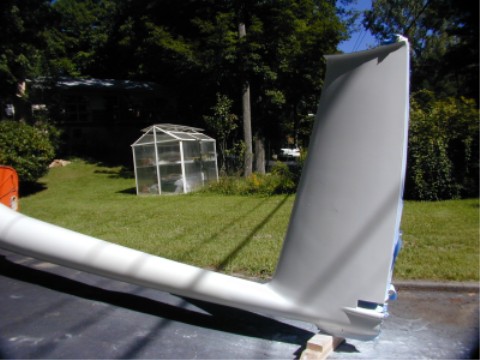 |
| This stuff goes on with a natural orange-peel. After a few minutes, it starts to flow a little and some of the roughness flows out, but after it sets up (24 hours) it's still orange peeled and then the sanding begins. | 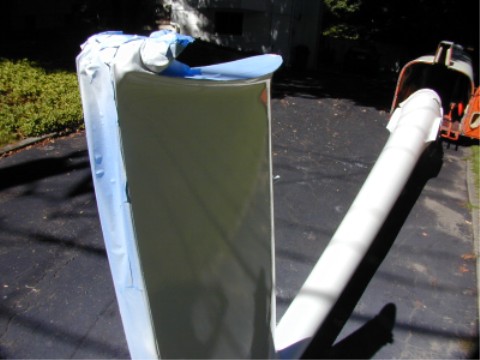 |
| You can really see the orange peel in this shot. I restored an Alfa-Romeo GT Junior about 20 years ago and my brother in-law painted it using the same technique - spray on the color and lots of clear coat, then we sanded until we dropped and buffed it out, came out great. I'm hoping this works as well. | 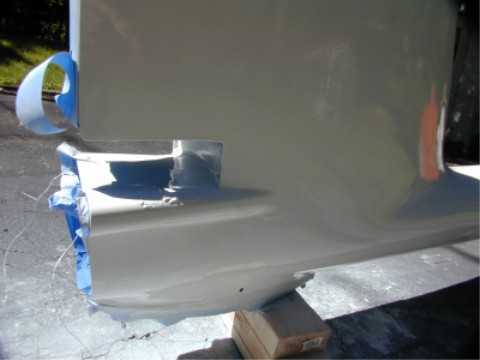 |
| OK, it's the next day and the Simtec has hardened nicely. A bit of sanding and I'm thrilled to see a nice flat surface. Starting with 220, going to 400, then 600 and 1500 for a test and I run into the house to get Renee and show her I'm not crazy after all. | 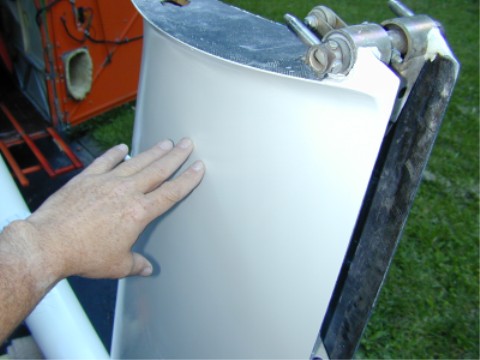 |
| I experiment with a red marker, rubbing it on the orange peel to provide a sanding guide. This works quite well to show when I was getting close to flat and it also revealed any pinholes and low spots. | 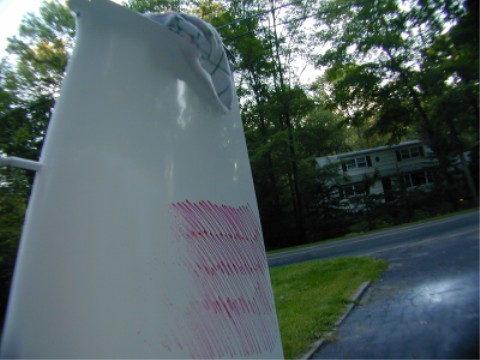 |
| This process is well-documented on the Sailplane Racing Association web site and I'm following those instructions (as well as Simtec's instructions) very closely - until I get to this step. I'm deathly afraid of sanding off too much gel-coat, so I'm doing this by hand. It's a long slog with 220 just to get it flat, I'll come back later with the rest of it (400, 600, etc.) to finish it off once I get it flat and I don't have to re-spray anything that I sanded through or fill any pinholes. | 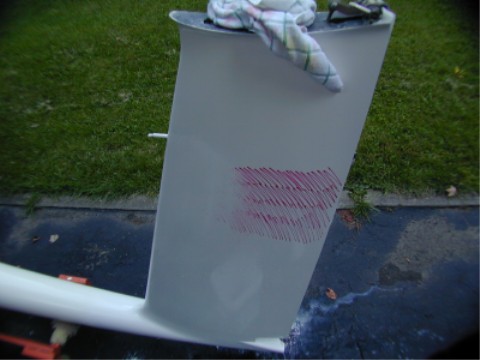 |
| You can see the test section at the top of the vertical where I took it down to 1500 and buffed it briefly - looks great. Just below that is 220 grit and I'm finishing the orange peel at the bottom with 220 on a rubber block. | 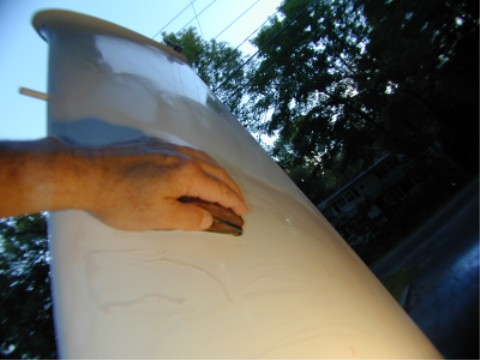 |
| For the leading edge of the vertical, I'm using a foam-backed sandpaper product that conforms nicely. I'm rubbing ever so gently here because it's very easy to take too much off this relatively sharp edge. Knowing this, I sprayed the gel-coat on thick here. It's getting late and both my arms are tired now. | 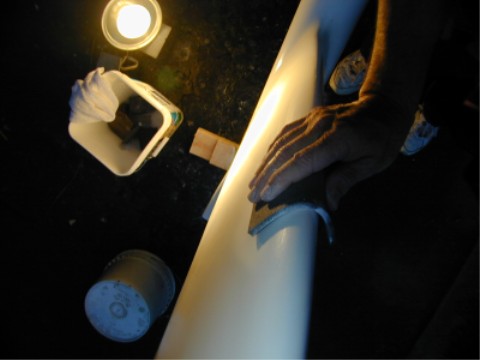 |
| OK, flying is over now that the crappy weather has settled in for a couple of weeks, so back to re-finishing. Fiona rests from her long day of supervising the traffic on Bennetts Farm Road. | 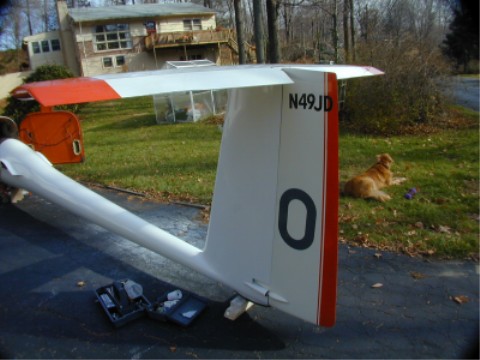 |
| I put another coat of Prestec 2481 on the fin to fill pinholes and build up where I sanded too far (I'm starting to learn how much to sand and when to stop) and have started to sand it down. The Quality Control Supervisor checks for missed sanding scratches and a flawless finish. This time I used blue Pelikan ink as a sanding guide - works better than the marking pen. | 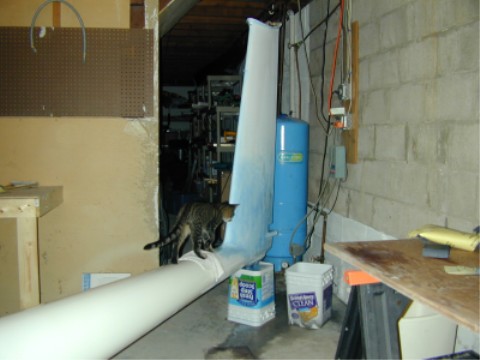 |
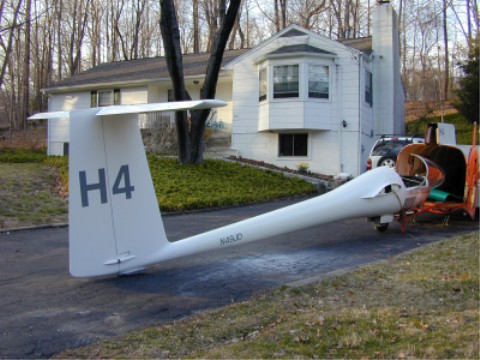
| Empennage finished - March 29, 2002 | 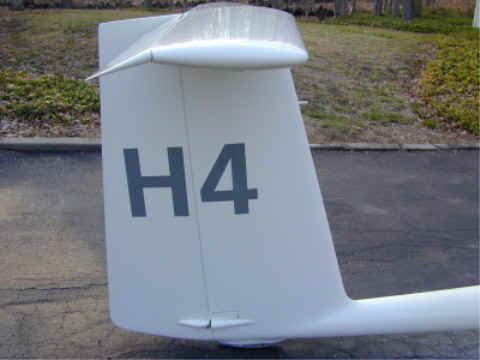 |
 |
|